Mastering Image Orientation on iPhone: A Comprehensive Guide
Related Articles: Mastering Image Orientation on iPhone: A Comprehensive Guide
Introduction
With great pleasure, we will explore the intriguing topic related to Mastering Image Orientation on iPhone: A Comprehensive Guide. Let’s weave interesting information and offer fresh perspectives to the readers.
Table of Content
- 1 Related Articles: Mastering Image Orientation on iPhone: A Comprehensive Guide
- 2 Introduction
- 3 Mastering Image Orientation on iPhone: A Comprehensive Guide
- 3.1 Understanding Image Orientation
- 3.2 Rotating Images on iPhone: Methods and Techniques
- 3.3 Tips for Optimizing Image Orientation
- 3.4 FAQs: Addressing Common Queries
- 3.5 Conclusion: Empowering Image Control
- 4 Closure
Mastering Image Orientation on iPhone: A Comprehensive Guide
In the digital age, images are ubiquitous, capturing moments, conveying information, and enhancing communication. The ability to effortlessly adjust the orientation of these images is paramount, ensuring they are displayed correctly and aesthetically pleasing. The iPhone, a device renowned for its intuitive interface and powerful capabilities, provides users with a variety of methods to seamlessly manipulate image orientation, enabling them to present their visual content in the most favorable light.
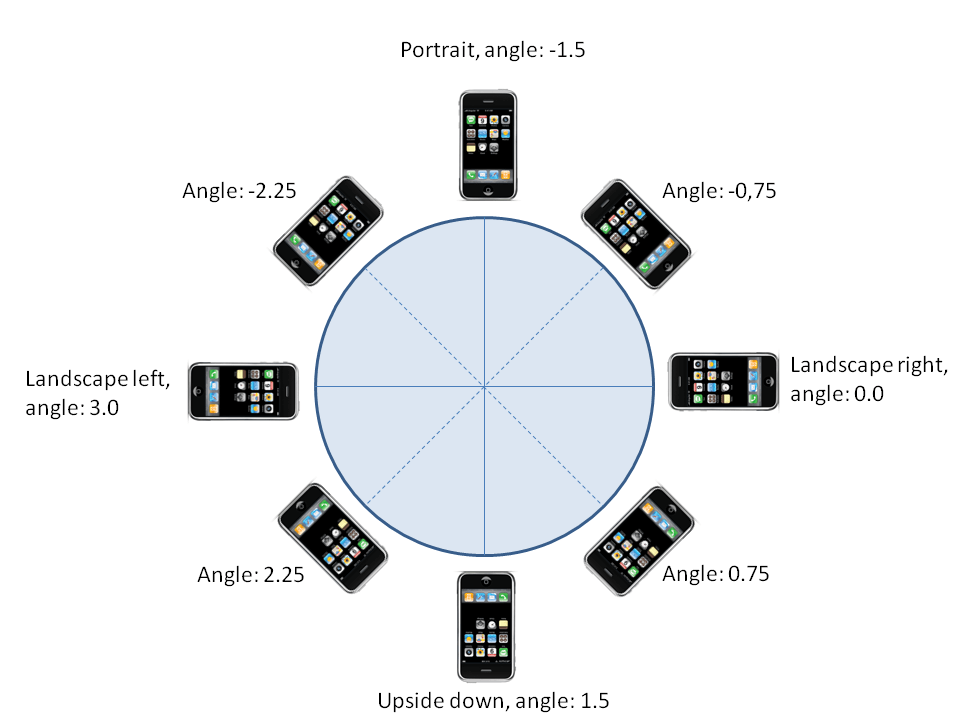
Understanding Image Orientation
Image orientation refers to the way an image is displayed, specifically whether it is oriented vertically (portrait) or horizontally (landscape). The correct orientation is essential for a number of reasons:
- Aesthetic Appeal: A portrait image displayed in landscape mode, or vice versa, can appear distorted and aesthetically unappealing.
- Clarity and Readability: In images containing text, the correct orientation ensures readability, preventing text from being displayed at an awkward angle.
- Social Media Compatibility: Many social media platforms optimize their display for specific orientations. An image uploaded in the wrong orientation might not be displayed correctly or may appear cropped.
- Printing Considerations: When printing images, the orientation must be accurate to avoid printing a distorted or cropped image.
Rotating Images on iPhone: Methods and Techniques
The iPhone offers a range of methods for rotating images, catering to diverse user preferences and scenarios. Here are some of the most common and effective techniques:
1. Using the Photos App:
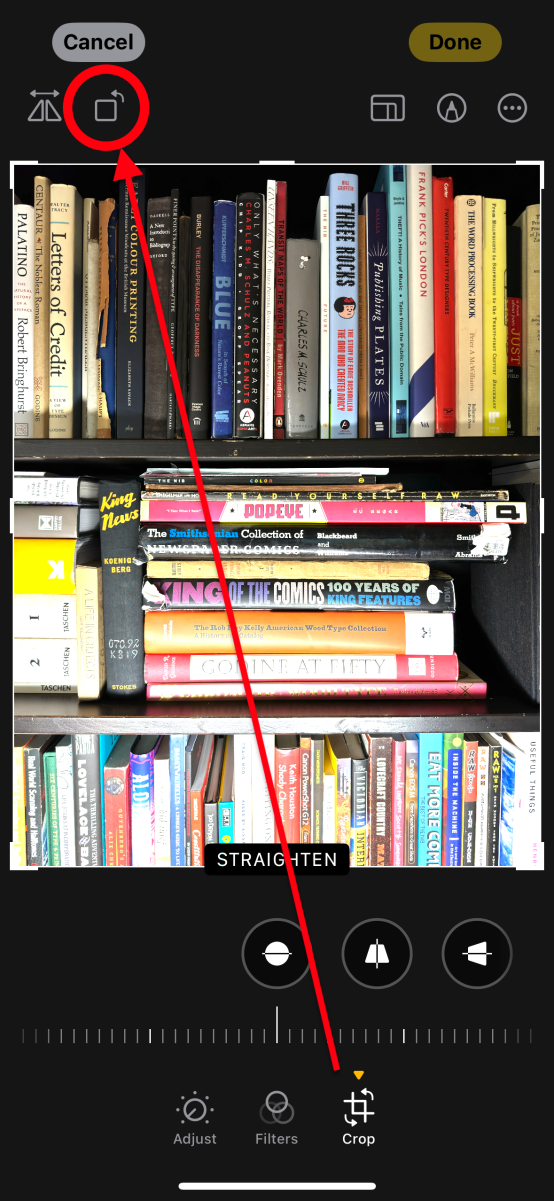
- Direct Rotation: The Photos app is the primary tool for rotating images on iPhone. Simply open the image you wish to rotate and tap the "Edit" button. You will see an icon resembling a curved arrow. Tap this icon repeatedly to rotate the image 90 degrees clockwise until it reaches the desired orientation.
- "Straighten" Feature: If the image appears slightly skewed, the Photos app’s "Straighten" feature can be used to correct the tilt. Tap the "Edit" button, then tap the "Straighten" icon (represented by two parallel lines with a curved arrow). Drag the slider to adjust the image’s angle until it is perfectly aligned.
2. Utilizing Third-Party Apps:
While the Photos app provides basic image rotation capabilities, third-party apps offer more advanced features and options. Some popular apps include:
- Adobe Photoshop Express: This powerful app allows for precise image rotation, cropping, and other editing functions.
- Snapseed: Snapseed offers a comprehensive set of editing tools, including a dedicated "Rotate" tool for precise adjustments.
- VSCO: VSCO is a popular photo editing app known for its artistic filters and editing options, including image rotation.
3. Employing Other iOS Features:
- Share Sheet Rotation: When sharing an image, the iPhone’s share sheet provides an option to rotate the image before sharing. Select the image, tap the "Share" button, then tap the "Rotate" icon (represented by a curved arrow) in the share sheet.
- Mail App Rotation: When attaching an image to an email, the Mail app allows for rotation. Tap the image attachment, then tap the "Rotate" icon (represented by a curved arrow) to adjust the orientation.
Tips for Optimizing Image Orientation
- Preview Before Sharing: Before sharing an image, always preview it to ensure the orientation is correct.
- Utilize the "Straighten" Feature: Even if an image appears slightly tilted, use the "Straighten" feature to ensure perfect alignment.
- Experiment with Third-Party Apps: For more advanced editing needs, explore the features of third-party photo editing apps.
- Consider the Context: When rotating images, always consider the context and intended use. For example, a landscape image might need to be rotated for a social media post but not for printing.
FAQs: Addressing Common Queries
Q: How do I rotate an image in the Photos app without editing it?
A: The Photos app does not offer a way to rotate an image without editing it. Rotating an image in the Photos app will always result in a new version of the image being saved.
Q: Can I rotate multiple images at once?
A: The Photos app does not allow for batch rotation of images. You must rotate each image individually.
Q: What is the difference between rotating an image and straightening it?
A: Rotating an image changes its orientation by 90 degrees, while straightening corrects a slight tilt or skew in the image.
Q: How do I rotate an image that has been saved in the wrong orientation?
A: You can rotate the image using the methods outlined above. However, keep in mind that this will create a new version of the image, leaving the original image unchanged.
Conclusion: Empowering Image Control
The ability to rotate images on iPhone is a fundamental aspect of digital image management. By understanding the various methods and techniques available, users can confidently manipulate image orientation, ensuring their visual content is displayed correctly and aesthetically pleasing. Whether it’s for social media, printing, or personal enjoyment, mastering image rotation empowers users to present their visual narratives in the most impactful way.


Closure
Thus, we hope this article has provided valuable insights into Mastering Image Orientation on iPhone: A Comprehensive Guide. We thank you for taking the time to read this article. See you in our next article!